
Showing posts with label illustrator. Show all posts
Showing posts with label illustrator. Show all posts
How to Use the Pathfinder Tool - Illustrator Series
How to Use the Pathfinder Tool
To display the Pathfinder you will have to go to Window > Pathfinder to make it visible.


design.tutplus.com
How to Create Banner, Label and Badge Templates in Illustrator
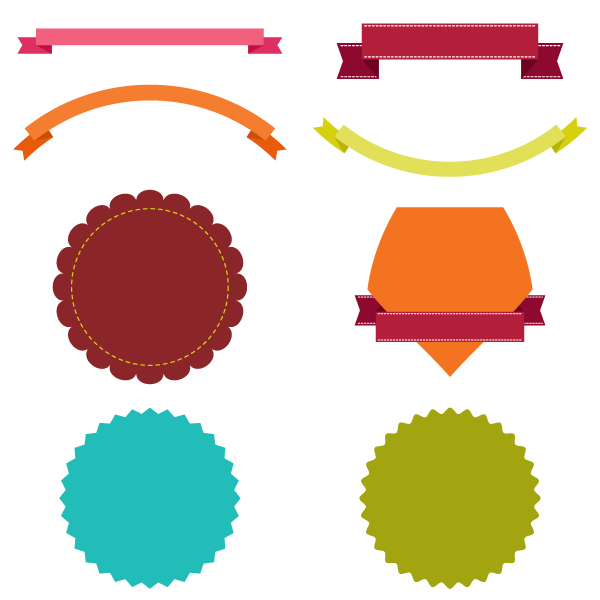
In this tutorial you will learn how to create different banner, label and badge templates which you can use in your future art projects.
Design an Eye-Catching Hamsa T-Shirt in Adobe Illustrator

What is "Hamsa"? You most probably have seen the Hamsa hand, without really knowing what it's called or the meaning behind it. The word Hamsa means "5" and is a powerful number that represents defense, power and fortune. It's illustrated in the popular hand-shaped symbol, with three extended fingers and a curved thumb and pinky finger. The symbol is believed, in the Jewish and Middle Eastern communities, to protect one from the "evil eye": an "envious stare" that casts bad luck, misfortune or evil on the person at whom it is directed.
How To Create a Seamless Anchor Pattern In Adobe Illustrator

Need a seaworthy pattern for your summer designs? A patterns with anchors and life preservers might just do the trick.
In this tutorial, we’ll be designing a simple and stylish nautical geometrical seamless pattern, creating the perfect pattern for a light touch of summer. Armed with the Pattern Tool, basic shapes in Adobe Illustrator, and a very handy free script, you'll be able to make great geometric patterns using any design you want in no time.
How to Create a Thanksgiving Illustration With Basic Shapes Using Illustrator

Thanksgiving is here! In this tutorial, you will create a pilgrim character, bowl and roasted turkey in Adobe Illustrator. Using just simple shapes - it's easy, festive and fun.
Create a Dimensional Raindrop Desktop Wallpaper Illustration in Adobe Illustrator

In this tutorial we'll use simple shapes and create cut-outs and gradients to generate depth and dimension within a widescreen-friendly desktop wallpaper. Drop Shadows and offset objects join our gray and white gradients to finish this design off in spectacular style. Use the
english
,
illustrator
,
pelajaran
,
tutorial
How to Create Pixel Art Icons in Adobe Illustrator
In this beginner tutorial, you'll learn techniques for creating forever scalable pixel art in Adobe Illustrator. With the use of the Rectangular Grid Tool and the Live Paint Bucket Tool, we'll
english
,
illustrator
,
pelajaran
,
tutorial
Lets Create Hand-Drawn Frames! With Adobe Illustrator

In this tutorial you'll use the Blob Brush Tool in Adobe Illustrator to create small portions of designs that are copied, pasted, and rotated to form complete, ornate frames. By combining
english
,
illustrator
,
pelajaran
,
tutorial
Create a Cartoon-Like Elemental Sword like in Game? Lets do It
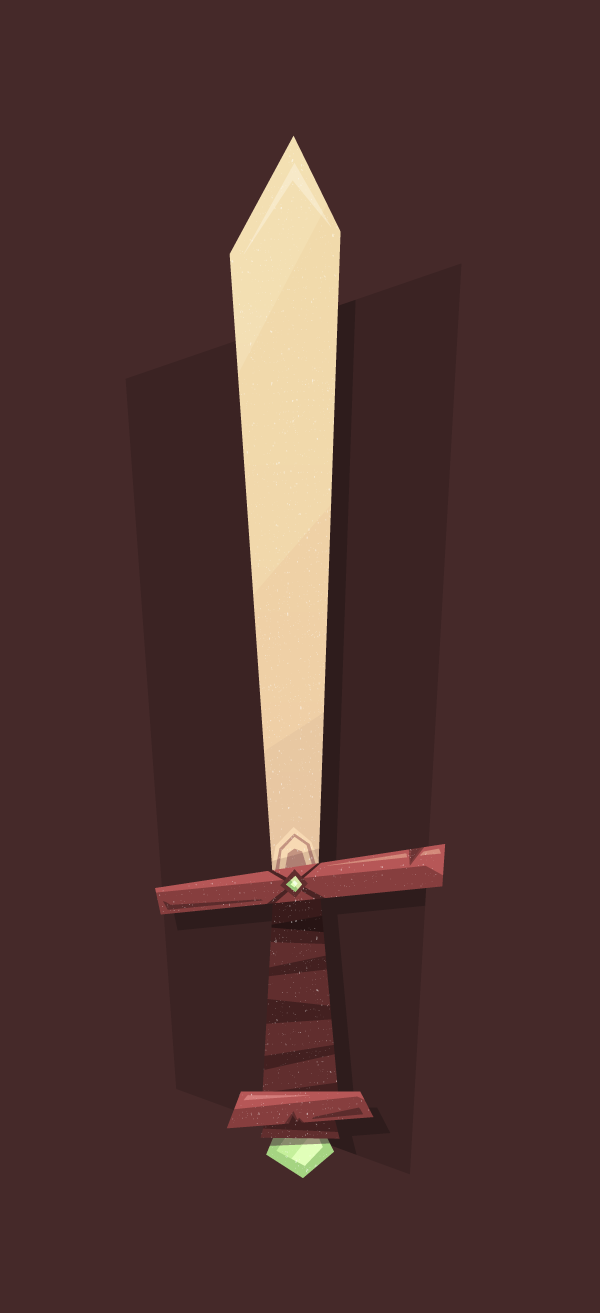
In this tutorial I’m going to show you how to create your own cartoon-like Elemental Sword that might come in handy in future projects.
english
,
illustrator
,
pelajaran
,
tutorial
So Cute..., How to Draw Little Red Riding Hood with Basic Shapes in Adobe Illustrator

In this tutorial you will learn how to create an adorable cartoon Little Red Riding Hood with her basket and bunch of flowers. You will use the Pen Tool (P) and basic shapes such as the Rectangle Tool (M), the Ellipse Tool (L) and the Polygon Tool. This is a great tutorial for those who are getting the hang of Adobe Illustrator's basic tools.
Simple Step to Create a Diskette and Walkman with New Live Shapes in Adobe Illustrator

One of the many updated features Adobe unveiled with Adobe Illustrator CC 2014 was the inclusion of Live Shapes. Like Live Corners before them, Live Shapes brings greater control over closed path objects, speeding up workflow. Put your memory to the test with this simple shapes tutorial making use of this fantastic new feature.
1. Basic Diskette Shapes
Step 1
Start with the Rectangle Tool (M) and draw an "almost square" (slightly longer than it is wide).
In the Transform panel, and with the rectangle Selected, unlink the Live Corners. Set three of the four corners as Rounded with a Radius of 0.05 inches. The upper right corner should be set to Chamfer with a Radius of 0.15 inches.

Step 2
The shutter of the diskette (the sliding door bit) is created with three rectangles. The largest of the three has all four corners rounded at the same radius (this is the outer rectangle). In the final piece, the fill color will be set to black,the stroke to gray, and the Stroke Weight to 1-2pts.
The middle one (seen as a line in the first image) has only the right corners rounded to match the largest rectangle.
The smallest rectangle is rounded on all four sides but is narrow and vertical rather than horizontal like the other two. Set the fill color to black and the stroke to null.

2. Diskette Details
Step 1
The left side of this disk design has another rectangle with mismatched corners. the two left corners are Rounded at 0.09 inches whereas the two right corners are at a 90° angle.

Step 2
With the Rectangle Tool, draw a small filled-in square in the lower corners of the disk. For the disk's label, draw a rectangle whose lower corners are 90° angles and upper corners are Rounded at 0.05 inches.

Step 3
Set the fill color of the main rectangle shape to black (or whatever you're using as your disk's overall color) and make sure other shapes that need to stand out have light stroke colors (see below).

3. Build the Walkman Shapes
Step 1
Start with a horizontal rectangle, drawn once again with the Rectangle Tool. Roundthe corners out in the Transform panel, or by pulling the Live Corners with the Direct Selection Tool (A) inward slightly.

Step 2
For the beveled portions of the plastic device, draw a narrow, horizontal rectangle in the lower half of the main rectangle shape. Round the corners slightly. Draw another thin, horizontal rectangle that has the same width as the main rectangle shape.

Step 3
Round the two lower corners of the narrow rectangle in the Transform panel. Bring them in as far as possible so they align with the other rectangle's corners. In this case, the Radii topped out at 0.23 inches, which aligned perfectly.

4. A Window Inside
Step 1
The beveled area that holds the window that looks into the Walkman starts with another rectangle, this time covering the top half (or so) of the base rectangle (see below for placement). The bottom two corners will remain at a 90° Angle. Use the Direct Selection Tool in order to Select and pull each corner inward as far as it can go, resulting in the window's rounded, yet flat shape.

Step 2
For the window itself, start with a rectangle, Round the corners to 0.1 inches or so, and use the Direct Selection Tool to carefully pull the top corner Anchor Pointsinward so the top corners are at an angle that mimics the outer bevel from the previous step.
I pulled the top Live Corners as far as they could go, which led to moving the anchor points manually. The images below show the difference between manipulating the top two corners' Live Corners versus having moved the anchor points themselves afterwards.

5. Reel to Reel
Step 1
The reels inside are a series of ellipses. Draw them using the Ellipse Tool (L), stacking them on top of each other and Aligning their centers.
Alternatively, you can draw one ellipse and Offset (go to Object > Path > Offset Path) the path of that ellipse by -4 pixels one time, and by -2 pixels three times following in order to get the stack of 5 ellipses. Either way you do it, Group (Control-G) together your ellipses and make sure there's two sets on either end of the Walkman's window.

Step 2
Select the window and window bevel shapes and hit Minus Front in the Pathfinderpanel. Place the stacked ellipses from the previous step beneath the window in the Layers panel. Draw another rounded rectangle between the two ellipse stacks, beneath the window shape.

6. Final Details
Step 1
Now that we've got most of the shapes for the Walkman completed, I've changed the fill and stroke colors to my final choices. Most of the shapes have been filled in with black, stroke colors set to gray, and the Stroke Widths, set in the Stroke panel, are 1-2pts. All stroke Corners and Caps are Rounded.

Step 2
There are a series of buttons on the top edge of the walkman. Each is the same height (when not pressed), but vary in width. Draw rectangles across the top in varying sizes and one on the right edge.

Step 3
I found it easiest to Copy (Control-C) and Paste (Control-V) the rectangles across and shorten or lengthen their width accordingly, that way their height was uniform. Round the top two corners of each rectangle in the Transform panel.

Step 4
Finally, there are two triangles that appear on the front of the Walkman. Use the Polygon Tool to a small, 3-sided figure of 0.12 inches (or more, or less depending on the size of your artwork and document). Use the Selection Tool (V) to pull the shape upward, causing it to become more narrow. Rotate it to the left. Copyand Paste the triangle and Rotate it all the way to the right. Place both on the front of the music player.

Well Done, You're Through!
With Live Shapes, changing the corners and general shape of rectangles and squares is easier than before. No longer does drawing an accurate representation of an early 90's era Gameboy require carefully positioning anchor points and manipulating handles. What else can you quickly create with basic shapes around your desk, bag, or home? Show us in the comments below!

english
,
illustrator
,
pelajaran
,
tutorial
Create Typeface Characters? Nice Idea
I started a character design project that merges typefaces into unique monsters, cute animals, and various other font inspired character creations. The method is simple, I take different sections of the characters of a specific font and I put them together, giving birth to different kinds of creatures.
Pelajaran 01 - Siapakah Adobe Illustrator itu??
Tak Kenal maka Tak Sayang, Siapakah Adobe Illustrator itu??
Illustrator
adalah aplikasi gambar vector. Biasanya aplikasi ini digunakan untuk menggambar
ilustrasi, kartun, diagram, logo, desain kemasan, desain pakaian, dll. Tidak seperti
gambar bitmap yang menggunakan sistem titik-titik yang ditata sedemikian rupa (grid
of dots), illustrator menggunakan perhitungan matematika untuk menggambar
sebuah bentuk/benda. Ini yang menyebabkan gambar vector lebih tajam apabila
diperbesar (gambar tidak pecah).
Sweet Lollipop, Manis Sekali! Ayo Kita membuat sendiri Lollipop dari Illustrator

Siapa yang tidak suka permen??????
Siapapun suka permen,
apalagi permen lollipop, dari gambar saja udah bikin ngiler :D, hari ini
vectorpath akan membuat permen dan lollipop dari vector! Tutorial ini hanya menggunakan basic tool dan brush strokes
panel saja! Wow! Disini kamu akan belajar beberapa basic shapes, spiral, create new brushes, lalu diramu menjadi objek
yang sangat manis J. Daripada kebanyakan
ngomong, langsung aja eksekusi!
Sticky Notes
- Aplikasi: Adobe Illustrator CS6
- Tingkat Kesulitan: Mudah
- Tool : Basic Tools and Effects, Brushes
- Estimasi Waktu: 30 minutes
Langkah Pertama
Mulailah dengan membuat sebuah
artboard dengan ukuran 800 x 600px. Pilih CMYK color
mode, Ukuran Screen (72ppi) dan pastikan “Align New Objects to Pixel Grid”
box is jangan dicawang / unchecked sebelum kamu klik OK.

Buatlah sebuah persegi panjang (atau
selanjutnya kita sebut rectangle) dengan Rectangle Tool (M). atur ukuran
dengan panjang=540px dan tinggi 40px. Masuk ke Menu Effect -> Stylize
-> Round Corners. Atur Radius menjadi 20px. Beri warna
rectangle abu-abu. Lalu buatlah rectangle lagi dengan Rectangle Tool (M).
duplikat rectangle tersebut: “klik objeknya, tekan dan tahan ALT dan
geser ke kanan. Setelah itu tekan Ctrl+D untuk mengulangi gerakan sebelumnya”,
ulangi terus, sampai panjang objeknya menyesuaikan dengan objek rectangle
pertama (warna abu-abu). Seleksi semua objek baru tadi, beri warna merah.


Langkah Ketiga
Saat rectangle (warna merah) masih
terseleksi semua, masuk ke Object > Transform > Shear, atur Shear
Angle to 45°, klik OK. Kamu dapat bereksperimen dengan menggunakan
angle yang lain, kalo ingin melihat previewnya, cawang Preview box.
Setelah itu, seleksi lagi semua objek merah, lalu tekan Crtl+G (untuk menjadikan satu grup objek). Lalu tempatkan di atas
objek rectangle pertama.

Langkah Keempat
Sekarang pilih rectangle pertama
(abu-abu), tekan Ctrl+C (untuk
membuat kopian objek). Lalu sekarang pilih objek pertama dan kedua (objek
grup), setelah itu potong dengan intersect (Window -> Pathfinder Panel
-> Intersect) sambil menaham Alt Key. Lalu pada Pathfinder Panel tekan
Expand. Maka objek merah akan terpotong menyesuaikan lebar objek pertama. tekan
Ctrl + B to menaruh hasil kopian objek pertama tadi pas di belakang
objek merah.

Langkah Kelima
Buatlah new rounded rectangle (panjang=510px / tinggi=8px),
beri warna putih, dan taruh agak ke atas dari objek (membuat seolah-olah ada
kilatan), setelah itu masuk ke Blending Mode (Window -> Transparency
Panel) ganti menjadi Overlay atau
kamu bisa mengurangi opacity menjadi 50%. Seleksi semua objek dan grup
menjadi satu (Ctrl+G). Sekarang Drag
grup tersebut ke Brush Panel (Window >
Brushes Panel).

Langkah Keenam
Pilih Art Brush sebagai new Brush type, klik OK dan objek tadi menjadi
brush baru dan akan tampil di brush panel. Kamu juga bisa mengatur brush
properties, tapi apabila ingin memakai setingan standar, langsung tekan OK.

Langkah Ketujuh
Buatlah garis spiral dengan Spiral
Tool. Dan klik drag untuk otomatis membuat spiral. Kamu juga bisa
menambah/mengurangi lengkungan, rotasi, memperbesar dan lainnya dengan tambahan
Ctrl dan atau Alt (sewaktu membuat gambar dengan klik kiri, tahan ctrl/alt). atau
apabila kamu ingin menggunakan setingan manual, cukup klik satu kali, maka akan
ada beberapa pilihan yang bisa kamu coba, silahkan bereksperimen.
Langkah Kedelapan
Dengan menggunakan Direct Selection Tool
(A) klik titik terakhir anchor point (sebelah kiri bawah) dan arahkan
mendekati lengkungan spiral (lihat gambar).
Langkah Kesembilan
Tetap seleksi spiral tersebut, lalu
pilih brush yang sudah kamu buat sebelumnya di Brushes Panel.

Sekarang saatnya membuat sunduk
(pegangan :D), buatlah sebuah rounded rectangle (panjang=15 /tinggi=320px).
Letakkan di tengah-tengah dan belakang spiral beri warna dengan gradasi dari
putih ke abu-abu.

Langkah Kesepuluh
Ingat, kamu dapat mengedit / membuat
bentuk objek dari spiral dengan Direct Selection Tool (A) jadi kamu dapat membuat bentuk yang kamu inginkan. Kamu
juga bisa membuat bentuk permen yang lain, seperti permen natal yang bentuknya
kayak pegangan payung J.
Langkah Kesebelas
Untuk membuat permen natal, cukup
dengan membuat sebuah lingkaran dengan Ellipse Tool (L). lalu klik
Direct Selection Tool (A) pilih titik bawah anchor point (1) dan hapus. Sekarang dengan menggunakan Pen Tool
(P), klik pada titik anchor point (2) dan tambahkan satu titik anchor point (3) untuk
memperpanjang objek. Jika kurang panjang kamu dapat menarik titik lebih
kebawah, dsb. Sekarang, seleksi objek yang telah dibuat tadi, dan pilih dengan
brush yang telah kita buat sebelumnya. Dan lihat, sudah Jadi!!!

Langkah Keduabelas
Dan inilah hasil kerja keras kita
hari ini J

Gimana,
Keren dan Mudah sekali kan buatnya!. Tim vectorpath berharap kamu semua
menyukai tutorial ini. Selamat mempelajari hal baru lagi hari ini, tetap
belajar dan mencoba hal-hal baru. Dunia ilustrasi itu tidak terbatas jika kita
bisa mengexplorenya! Terima kasih juga kepada Zoltan
Ordog yang telah
menginspirasi tim vectorpath membuat tutorial ini. Jangan lupa nantikan
tutorial kami lainnya yang gak kalah keren dari ini.
Membuat Tombol Keren tanpa menggunakan transparencies atau blend di Adobe Illustrator!

Selamat datang di vectorpath, tempat dimana kamu bisa mendapatkan tutorial dan tips yang keren abis dan mudah diikuti untuk pemula!. Untuk tutorial pertama, penulis akan mencoba membuat tombol/button. penulis tahu di dunia maya sudah banyak bertebaran tutorial seperti ini, tapi kali ini penulis akan membuat dengan cara yang sangat sederhana, tanpa menggunakan blends dan transparencies. Memang bisa ya?Penasaran?, langsung aja ikutin kita mencoba
How Create a Super Happy Octopus Character with Adobe Illustrator

In Illustrator it's really easy to create fun characters with some simple shapes and the Pathfinder panel. In the following tutorial I will explain how to create a Happy Octopus Character. You can use these techniques and elements to create whatever character you want!
Subscribe to:
Posts
(
Atom
)