
Showing posts with label tutorial. Show all posts
Showing posts with label tutorial. Show all posts
Cara Mengarahkan Sub-Domain Ke Blogspot Via CPANEL Hosting
Admin Vectorpath kali ini akan membahas tentang bagaimana cara mengatur sub-domain ke blogspot, dimana kasusnya domain utama mengarah ke hosting dan sub-domain diarahkan ke blogspot, memang sepintas sepertinya agak ribet, tetapi sebenanya tidak terlalu sulit. untuk lebih jelasnya silahkan lihat gambar berikut.
1. Masuk ke bloger.com dan Masuk ke Setelan

2. Klik pada “Siapkan URL pihak ke-3 untuk blog anda”.

3. Masukan nama Sub Domain anda (misalnya “vectorpath.weverx.com” )

4. Kita Mendapatkan Cname dari blogspot untuk mengkonfigurasi domain kita, Simpan Cname nya ya.

Sampai Disini kita sudah berhasil Mendapatkan Cname Dari Blogspot. selanjutnya kita akan seting DNS, dari Home cPanel Klik Advanced DNS Zone Editor

Tambahkan satu persatu 4 ip blogsbot di Advanced Zone Editor
216.239.32.21
216.239.34.21
216.239.36.21
216.239.38.21
216.239.32.21
216.239.34.21
216.239.36.21
216.239.38.21

Jangan lupa tambahkan juga record Cname dari BLoger nya


admin pastikan kembali ya Record nya seperti gambar dibawah ini..

Selesai untuk mengatur DNS kembali ke Dasbord Blogspot. lakukan Simpan, Dan pastikan Sudah tersimpan sengan Sub domain kita. untuk proses perubahan biasanya memerlukan beberapa jam. Lihat gambar dibawah

Baiklah, apabila ada pertanyaan bisa disampaikan di kolom komentar, terima kasih
Apa itu CPANEL? What is cPanel?
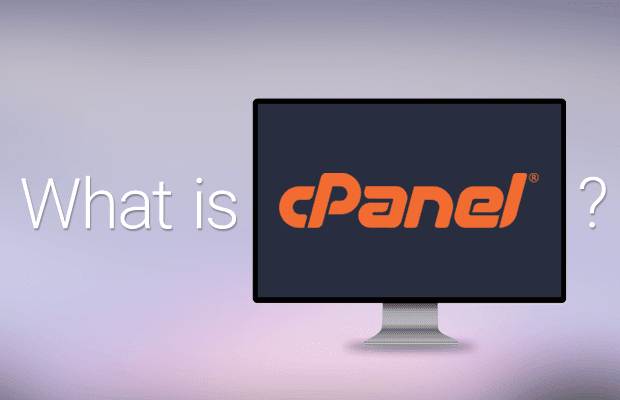
cPanel, as its name suggests, is a web based control panel used for managing Linux or Windows based web servers or hosts. It allows users to control email addresses, domain names, databases, different PHP versions and almost every aspect of a web server, thus making it possible to manage all hosted services in a single place. Developed by the cPanel company, cPanel is mostly written in Perl.
cPanel is a great, customizable control panel, which successfully withstood the test of time, and has an active community behind it, which can help you overcome any problems or difficulties that arise during its use. The popularity and widespread use of cPanel is also due to the fact that it has a straightforward interface that can be easily comprehended by first-time users as well. But its enterprise-level features (multi-server management, IPV6 support) make it suitable for more professional use as well.
Accessing the cPanel
You can access the cPanel installation by means of a web browser. The address of the panel will be given by your server or hosting provider. You should not be scared by the :2082 in the URL as that is the port number to which cPanel listens by default. However, you should only access cPanel via a secure HTTPS connection, otherwise you might risk a security breach.

The cPanel interface
The cPanel interface has been refined over the years, again and again, and the interface itself can be customized by the web hosting company offering the services, but in general they have the following main sections: Preferences, Mail, Files, Database, Domains, Security and Logs. The easy-to-use and polished interface is one of the many aspects that account for the popularity of this control panel.
cPanel Features
cPanel is one of the most feature rich control panels out there.

In the Mail section you can set up new email accounts, forwarders, you can fine tune SpamAssasin settings, manage mail list, define catch all email addresses, etc. Most email settings can be done with just by a few clicks.
Under the Domain you can find the Simple Zone Editor through which the editing of Zones can be easily achieved. Here you can also define redirects and you can edit other domain and DNS related settings.
You can find the PHPMyAdmin usually under the use that too. Another nice feature Database section. The management of MySQL databases from a web interface is pretty convenient, but if you prefer MySQL Workbench you can of cPanel is the ability to “mount” or use remote databases. Besides MySQL, cPanel can manage PostgreSQL databases too.
cPanel comes with a very convenient backup system, which can be found usually under the File section. It can be used to create non-incremental, snapshot based backups from Databases, Files, Email settings, or you can back up the whole panel to a single archive. This feature is very useful when you want to move to another host, which also offers cPanel as a control panel. If you want to move from a hosting company to another one which uses a custom control panel, migrating can be quite a complex task, but not if it’s done from cPanel to cPanel. Here, under the Files section, you usually find the FTP settings page, which allows you to set up new FTP accounts, or edit old ones. You can specify the account’s home directory if you want, but it is usually pre-populated for you.

With cPanel, you can usually choose which version of a particular software you want to use, with just a few clicks you can select the PHP version for example. You still have the old PHP code which uses the mysq_connect and mysql_query functions? No problem, change the PHP version to 5.X and you are good to go. You want to squeeze some extra performance from your actual PHP web application? Just change the PHP version to 7.X and you can instantly benefit from the faster PHP interpreter in terms of page generation times.
Other features worth mentioning are raw and parsed access and error log access, so a developer can see the exact errors produced by the applications, while the site owner can see the access statistics and traffic fluctuations or trends. It has cron job support, you can define your custom apache handlers or even add custom mime-types, it has an easy to set up Basic Auth based folder password protection, easy to use SSL setup with self-signed certificates and/or CSR generation.
Hosting resources
You can always see the current resource usage like bandwidth, storage, number of FTP or Email accounts, number of databases, number of sent emails, etc. Some hosting providers even set up email based alerts if you are close to the set limit, so you can take immediate action. This can help you have a clear overview of your hosting resources and control their allocation.
cPanel Extensibility
The features of cPanel can be extended using third party plugins. There are quite a few ready-made plugins in the cPanel App Catalog, but it can also be extended by custom-written plugins.
cPanel has a well-documented JSON API with ready-made clients in PHP and PERL and also supports a command line API client called cpapi2. If you have some tasks which you find yourself doing over and over again, you might consider implementing a client which does that for you, either as a Plugin or as a API client.
Source with Some rewrite : webhostingmedia.net
Source with Some rewrite : webhostingmedia.net
How to Use the Pathfinder Tool - Illustrator Series
How to Use the Pathfinder Tool
To display the Pathfinder you will have to go to Window > Pathfinder to make it visible.


design.tutplus.com
Apa itu DNS, Pengertian, Fungsi, dan Jenis dari DNS

Nah yang dimaksud alamat internet disini adalah angka-angka alamat IP. Misalnya jika facebook.com memiliki alamat IP 69.63.181.11 maka jika kamu mengetik 69.63.181.11 di browser kamu maka dengan otomatis browser kamu akan menampilkan facebook.com pada alamat address nya.
Sejarah DNS
Dahulu, semua komputer yang terhubung melalui jaringan masih menggunakan HOST.TXT untuk memetakan seluruh domain. Namun sistem ini memiliki kekurangan diantaranya jika suatu saat alamat IP berubah, maka file tersebut harus ikut diubah. Nah, dari sana kemudian muncul suatu sistem baru yang bernama DNS, jika ada yang mengganti host di suatu tempat maka yang lain akan mengikuti perubahan tersebut secara dinamis.Cara Kerja DNS
Untuk memahami cara kerja DNS, mari kita buat contoh sederhana seperti sistem yang ada di perhotelan. Misalnya kamu ingin mengunjungi beberapa teman yang ada di beberapa hotel. Lalu apa yang akan kamu lakukan? pastinya kamu akan menemui resepsionis dan memintanya menyebutkan nomor kamar dimana teman kamu menginap. Nah, untuk itu kamu perlu memberitahu nama teman kamu itu pada resepsionis. Dari sana resepsionis akan melihat di dalam database tamu dan memberitahu tentang nomor kamar teman kamu itu. Dia juga akan melakukan check apakah temanmu ada di kamar atau tidak.Dari sini mari kita sedikit hubungkan dengan cara kerja DNS. Anggap saja kamu berperan sebagai client, resepsionis sebagai server DNS, nama teman kamu sebagai domain, dan nomor kamar teman kamu sebagai alamat IP.
Nah, dari sini Resepsionis akan mencari di dalam database dari semua tamu, yang disebut Domain Name Space. Jika temanmu masih di dalam kamar maka resepsionis akan mengatakan ada di nomor berapa teman kamu itu, begitu juga dengan sebaliknya. Sama seperti sistem DNS, jika kamu mengetik nama situs di browser kamu, browser akan otomatis mengirim permintaan ke server DNS, jika nama situs yan akan kamu buka terdaftar di dalam database, maka ia akan menjawab permintaanmu dengan mengirim alamat IP dari situs yang akan kamu buka, seperti 117.234.214.13
Memahami Nama Domain dan IP Address
Dalam hal ini kita akan ambil contoh domain www.google.com. Pertama, DNS akan memeriksa com yang merupakan singkatan dari domain commercial sekaligus sebagai top level domain.Setelah itu google adalah sub-domain dari com, dan www adalah sub-domain dari google. Sementara Dot( . ) digunakan untuk memisahkan domain dengan sub-domain.Dari sini mungkin kamu sudah sedikit paham tentang DNS, nah sekarang jika seseorang ingin mengetahui hubungan domain dari suatu alamat IP, maka ia akan meminta server DNS dengan alamat IP dari website. Sebut saja alamat IP yang dikirim adalah 31.13.79.246, DNS pertama akan memeriksa 31 kemudian 13 kemudian 79 dan akhirnya 246. Hal ini berarti 31 memiliki poin utama atau bisa disebut domain utama sementara alamat 13, 79, 246 adalah sebagai sub-domain. Jumlah 246 mengacu pada mesin server hosting website www.fb.com
Jenis jenis DNS dan Fungsinya
A record: digunakan untuk memetakan hostname ke IP address 32-bit (IPv4).AAAA record: untuk memetakan hostname ke IP address 128-bit (IPv6).
MX Record: digunakan untuk memetakan domain ke mail exchange server
CNAME Record: kalo yang ini membuat nama alias dari sebuah domain.
NS Record: digunakan untuk memetakan domain kedalam satu daftar dari DNS Server.
Resolving DNS
Hal ini mengacu pada proses penerjemahan nama domain ke alamat IP masing-masing. DNSresolver adalah PC Client, sama seperti kamu di hotel itu misalnya, yang akan mengirimkan query ke server DNS atau resepsionis. Ada dua metode yang sering digunakan dalam hal ini, yaitu :Recursive: Sekarang mari kita lanjutin dengan contoh Hotel diatas tadi ya, anggap hotel ini memiliki lebih dari satu cabang di kota, dan resepsionis tidak dapat menemukan nomor kamar teman kamu.
Lalu ia akan memeriksa apakah teman kamu telah tinggal di cabang lain dengan menghubungi resepsionis hadir di sana. Jadi, jika server DNS tidak dapat menemukan IP dari nama domain yang dikirim dalam permintaan maka ia akan meminta server lain yang terhubung untuk menyelesaikan alamat IP untuk domain yang diminta. Artinya ia akan mengumpulkan informasi dari server lain lalu membalas dengan alamat IP yang kamu minta.
Iterative: Misalkan jika kamu juga ingin tahu tentang di lantai mana letak kamar teman kamu itu, maka untuk melakukannya, kamu tentunya akan bertanya lagi pada resepsionis. Sama seperti, jika DNS resolver ingin informasi lebih lanjut tentang domain, maka ia akan mengirim permintaan baru untuk server DNS yang sama.
DNS Cache
Server DNS sementara waktu ini akan menyimpan query permintaan kamu dalam bentuk Cache, sehingga dapat mengurangi waktu respon jika ada penyelesaian DNS lain yang meminta permintaan yang sama. Waktu yang berisi informasi Cache yang valid disebut TTL (Time To Live), diatur oleh administrator untuk setiap record query disimpan dalam cache.DNS Vulnerabilities
Cache Poisoning: atau bisa juga disebut DNS Spoofing, adalah teknik yang digunakan oleh cracker, di mana mereka akan mengubah data cache di server DNS lalu merender alamat IP yang salah kepada DNS resolver, kemudian bisa jadi untuk mengalihkan pengguna ke perangkat attacker.Phishing: adalah suatu metode untuk menipu para pengguna untuk mencuri id / password melalui form login pada suatu situs palsu yang menyerupai situs aslinya.
Custom DNS
DNS sejak pertama kali di buat adalah suatu terobosan yang sangat penting bagi kelangsungan setiap website. Bahkan kini ia mampu menghandle jutaan situs website di seluruh dunia. Tanpa DNS, pasti setiap orang akan kesulitan bahkan hanya untuk berselancar di dunia maya. Sekarang aku tanya, apa kamu masih ingat berapa IP Address dari facebook.com tanpa melihat halaman diatas? pasti susah kan? aku pun juga tidak ingat sebenarnya karena sudah ada DNS yang akan membantu kita mengingatnya.server DNS populer:
Google’s Public DNS: Raksasa internet yang satu ini juga memiliki layanan DNS gratis yang mampu menanggapi jutaan permintaan dalam satu waktu. Untuk mengkonfigurasinya, kamu bisa melakukan setting DNS :8.8.8.8 atau 8.8.4.4
OpenDNS:adalah sebuah perusahaan swasta yang menyediakan server DNS gratis yang aman dan terpercaya. Untuk mengkonfigurasinya, kamu bisa melakukan setting DNS :
208.67.222.222 atau 208.67.220.220
sumber artikel
How to Create Banner, Label and Badge Templates in Illustrator
In this tutorial you will learn how to create different banner, label and badge templates which you can use in your future art projects.
The A to Z of Typography

Whichever software programme you’re using, and whether you’re designing for print or online, typography will no doubt play a large part in the eventual success (or failure!) of your design.
A timely drop cap or an extra bit of tracking can elevate your designs to new levels, in the same way that a poor choice of font or illegible sizing can ruin an otherwise perfectly good layout.
Design an Eye-Catching Hamsa T-Shirt in Adobe Illustrator

What is "Hamsa"? You most probably have seen the Hamsa hand, without really knowing what it's called or the meaning behind it. The word Hamsa means "5" and is a powerful number that represents defense, power and fortune. It's illustrated in the popular hand-shaped symbol, with three extended fingers and a curved thumb and pinky finger. The symbol is believed, in the Jewish and Middle Eastern communities, to protect one from the "evil eye": an "envious stare" that casts bad luck, misfortune or evil on the person at whom it is directed.
How To Create a Seamless Anchor Pattern In Adobe Illustrator

Need a seaworthy pattern for your summer designs? A patterns with anchors and life preservers might just do the trick.
In this tutorial, we’ll be designing a simple and stylish nautical geometrical seamless pattern, creating the perfect pattern for a light touch of summer. Armed with the Pattern Tool, basic shapes in Adobe Illustrator, and a very handy free script, you'll be able to make great geometric patterns using any design you want in no time.
How to Create a Thanksgiving Illustration With Basic Shapes Using Illustrator

Thanksgiving is here! In this tutorial, you will create a pilgrim character, bowl and roasted turkey in Adobe Illustrator. Using just simple shapes - it's easy, festive and fun.
Create a Dimensional Raindrop Desktop Wallpaper Illustration in Adobe Illustrator

In this tutorial we'll use simple shapes and create cut-outs and gradients to generate depth and dimension within a widescreen-friendly desktop wallpaper. Drop Shadows and offset objects join our gray and white gradients to finish this design off in spectacular style. Use the
english
,
illustrator
,
pelajaran
,
tutorial
How to Create Pixel Art Icons in Adobe Illustrator
In this beginner tutorial, you'll learn techniques for creating forever scalable pixel art in Adobe Illustrator. With the use of the Rectangular Grid Tool and the Live Paint Bucket Tool, we'll
english
,
illustrator
,
pelajaran
,
tutorial
Lets Create Hand-Drawn Frames! With Adobe Illustrator

In this tutorial you'll use the Blob Brush Tool in Adobe Illustrator to create small portions of designs that are copied, pasted, and rotated to form complete, ornate frames. By combining
english
,
illustrator
,
pelajaran
,
tutorial
Create a Cartoon-Like Elemental Sword like in Game? Lets do It

In this tutorial I’m going to show you how to create your own cartoon-like Elemental Sword that might come in handy in future projects.
english
,
illustrator
,
pelajaran
,
tutorial
So Cute..., How to Draw Little Red Riding Hood with Basic Shapes in Adobe Illustrator

In this tutorial you will learn how to create an adorable cartoon Little Red Riding Hood with her basket and bunch of flowers. You will use the Pen Tool (P) and basic shapes such as the Rectangle Tool (M), the Ellipse Tool (L) and the Polygon Tool. This is a great tutorial for those who are getting the hang of Adobe Illustrator's basic tools.
Simple Step to Create a Diskette and Walkman with New Live Shapes in Adobe Illustrator

One of the many updated features Adobe unveiled with Adobe Illustrator CC 2014 was the inclusion of Live Shapes. Like Live Corners before them, Live Shapes brings greater control over closed path objects, speeding up workflow. Put your memory to the test with this simple shapes tutorial making use of this fantastic new feature.
1. Basic Diskette Shapes
Step 1
Start with the Rectangle Tool (M) and draw an "almost square" (slightly longer than it is wide).
In the Transform panel, and with the rectangle Selected, unlink the Live Corners. Set three of the four corners as Rounded with a Radius of 0.05 inches. The upper right corner should be set to Chamfer with a Radius of 0.15 inches.

Step 2
The shutter of the diskette (the sliding door bit) is created with three rectangles. The largest of the three has all four corners rounded at the same radius (this is the outer rectangle). In the final piece, the fill color will be set to black,the stroke to gray, and the Stroke Weight to 1-2pts.
The middle one (seen as a line in the first image) has only the right corners rounded to match the largest rectangle.
The smallest rectangle is rounded on all four sides but is narrow and vertical rather than horizontal like the other two. Set the fill color to black and the stroke to null.

2. Diskette Details
Step 1
The left side of this disk design has another rectangle with mismatched corners. the two left corners are Rounded at 0.09 inches whereas the two right corners are at a 90° angle.

Step 2
With the Rectangle Tool, draw a small filled-in square in the lower corners of the disk. For the disk's label, draw a rectangle whose lower corners are 90° angles and upper corners are Rounded at 0.05 inches.

Step 3
Set the fill color of the main rectangle shape to black (or whatever you're using as your disk's overall color) and make sure other shapes that need to stand out have light stroke colors (see below).

3. Build the Walkman Shapes
Step 1
Start with a horizontal rectangle, drawn once again with the Rectangle Tool. Roundthe corners out in the Transform panel, or by pulling the Live Corners with the Direct Selection Tool (A) inward slightly.

Step 2
For the beveled portions of the plastic device, draw a narrow, horizontal rectangle in the lower half of the main rectangle shape. Round the corners slightly. Draw another thin, horizontal rectangle that has the same width as the main rectangle shape.

Step 3
Round the two lower corners of the narrow rectangle in the Transform panel. Bring them in as far as possible so they align with the other rectangle's corners. In this case, the Radii topped out at 0.23 inches, which aligned perfectly.

4. A Window Inside
Step 1
The beveled area that holds the window that looks into the Walkman starts with another rectangle, this time covering the top half (or so) of the base rectangle (see below for placement). The bottom two corners will remain at a 90° Angle. Use the Direct Selection Tool in order to Select and pull each corner inward as far as it can go, resulting in the window's rounded, yet flat shape.

Step 2
For the window itself, start with a rectangle, Round the corners to 0.1 inches or so, and use the Direct Selection Tool to carefully pull the top corner Anchor Pointsinward so the top corners are at an angle that mimics the outer bevel from the previous step.
I pulled the top Live Corners as far as they could go, which led to moving the anchor points manually. The images below show the difference between manipulating the top two corners' Live Corners versus having moved the anchor points themselves afterwards.

5. Reel to Reel
Step 1
The reels inside are a series of ellipses. Draw them using the Ellipse Tool (L), stacking them on top of each other and Aligning their centers.
Alternatively, you can draw one ellipse and Offset (go to Object > Path > Offset Path) the path of that ellipse by -4 pixels one time, and by -2 pixels three times following in order to get the stack of 5 ellipses. Either way you do it, Group (Control-G) together your ellipses and make sure there's two sets on either end of the Walkman's window.

Step 2
Select the window and window bevel shapes and hit Minus Front in the Pathfinderpanel. Place the stacked ellipses from the previous step beneath the window in the Layers panel. Draw another rounded rectangle between the two ellipse stacks, beneath the window shape.

6. Final Details
Step 1
Now that we've got most of the shapes for the Walkman completed, I've changed the fill and stroke colors to my final choices. Most of the shapes have been filled in with black, stroke colors set to gray, and the Stroke Widths, set in the Stroke panel, are 1-2pts. All stroke Corners and Caps are Rounded.

Step 2
There are a series of buttons on the top edge of the walkman. Each is the same height (when not pressed), but vary in width. Draw rectangles across the top in varying sizes and one on the right edge.

Step 3
I found it easiest to Copy (Control-C) and Paste (Control-V) the rectangles across and shorten or lengthen their width accordingly, that way their height was uniform. Round the top two corners of each rectangle in the Transform panel.

Step 4
Finally, there are two triangles that appear on the front of the Walkman. Use the Polygon Tool to a small, 3-sided figure of 0.12 inches (or more, or less depending on the size of your artwork and document). Use the Selection Tool (V) to pull the shape upward, causing it to become more narrow. Rotate it to the left. Copyand Paste the triangle and Rotate it all the way to the right. Place both on the front of the music player.

Well Done, You're Through!
With Live Shapes, changing the corners and general shape of rectangles and squares is easier than before. No longer does drawing an accurate representation of an early 90's era Gameboy require carefully positioning anchor points and manipulating handles. What else can you quickly create with basic shapes around your desk, bag, or home? Show us in the comments below!

english
,
illustrator
,
pelajaran
,
tutorial
Subscribe to:
Posts
(
Atom
)